To free up storage space, easier sharing, or other reasons, you want to compress a video, photo, or PDF file on your Mac. Apple gives a convenient to zip files and folders to make them smaller. Compressed files will take up less space than the source ones. Besides, there are other helpful ways to compress a file on a Mac. This post will share several compression methods for different file types.
Mac has a built-in zipping function for you to compress a file or folder with ease. It allows you to compress most file types on your Mac and create a compressed ZIP file.
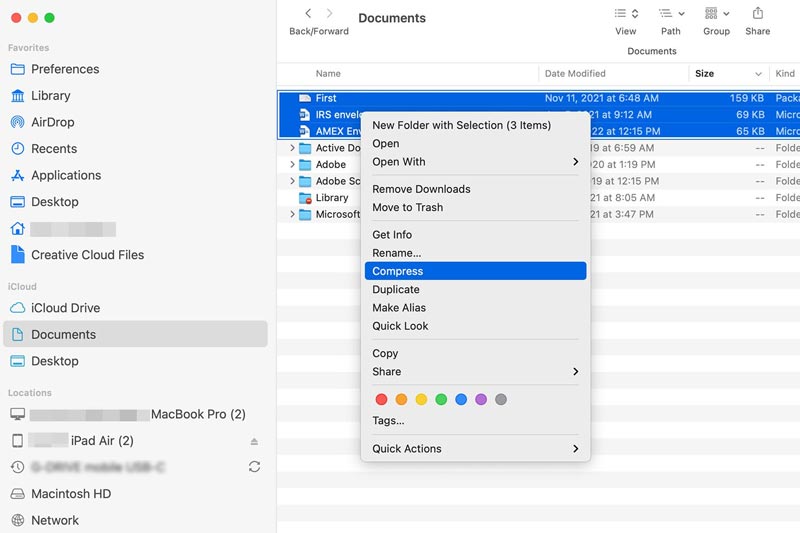
You can open Finder and locate the specific file/folder you want to compress. Right-click on it to show the context menu. Now, you can locate the Compress option and click it. Your Mac will compress the file or folder and make a ZIP file. If you want to compress multiple files at a time, you can select them by pressing the Command key, right-click on the selection, and then choose Compress.
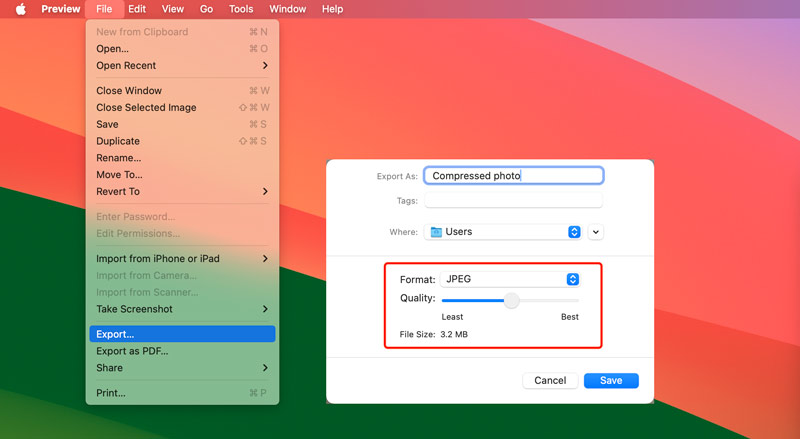
When you want to compress photos on your Mac, you can rely on the default image viewer, Preview. It provides a simple way to export a picture with a smaller file size. If you want to compress a PDF file, you can take similar steps.
When it comes to compressing a video on Mac, in most cases, that means reducing the file size of a video. Generally, you want to shrink the video size for better sharing or uploading. Here in this part, I will share three effective solutions to compress a video on a Mac.
If you prefer more control over video compression, you can turn to a dedicated video compression tool like Aiseesoft Video Converter Ultimate. It can edit, convert, and compress all popular video formats, including MP4, AVI, FLV, MOV, M4V, and others. It has a specially designed Video Compressor for you to quickly shrink your video to the correct size.
100% Seguro. Sin anuncios.
100% Seguro. Sin anuncios.
Download and open the video compression tool on your Mac. Go to More Tools and choose Video Compressor. Click + to browse and add your video file.

Drag the compression bar to control the final file size. Also, you can customize the output format, resolution, and bitrate to compress a video. It offers a handy Preview feature to directly view the compressed video. That ensures you won’t output a low-quality file that you don’t like. Rename the compressed file and then click the Compress button. If you need to compress your audio files on Mac, Aiseesoft Video Converter Ultimate offers its Compresor de audio función para ayudarte.

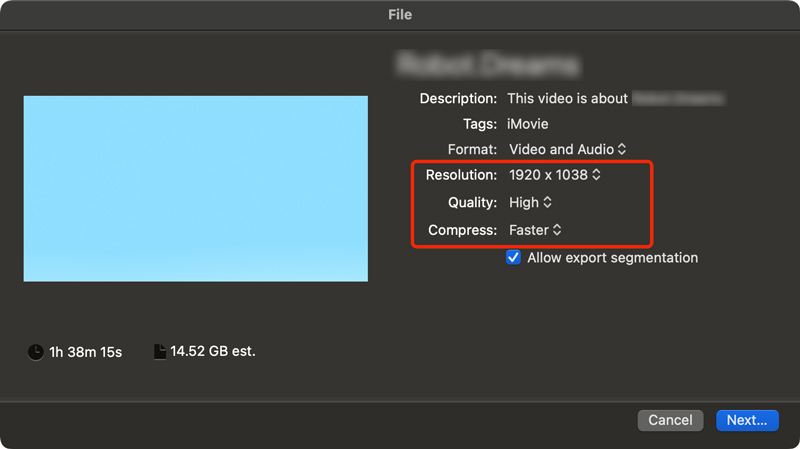
iMovie is pre-installed on Macs to deal with various basic editing tasks. Like the photo compression in Preview, iMovie enables you to reduce the file size of your video during the exporting process.
You can open your video file in iMovie, click the File menu, and then go to the Share window. Select a suitable option from the Resolution dropdown menus, such as 4K, 1080p, 720p, and more. Also, you can adjust the final quality to control the video compression. Ensure you export the video with a lower resolution and quality.
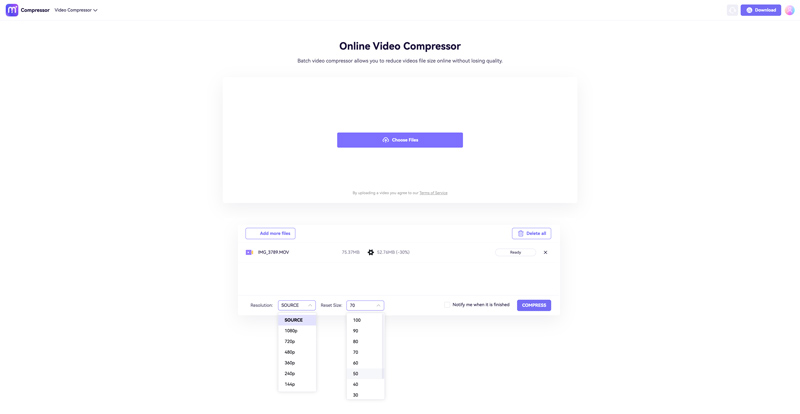
muchos gratis compresores de video online can help you reduce video sizes on a Mac. If you want to quickly compress a video, especially for a small file, you can turn to an online tool and start the video compression. Here, I take the popular Media.io as an example to show you how to compress a video online.
Search for Media.io Online Video Compressor and navigate to the page. Click Choose Files to upload your video. Note that you are not allowed to compress a video larger than 2GB. It will automatically shrink your video to a suitable file size once added. You can also manually control the compression and then click the Compress button.
Why can’t I compress a file on my Mac?
When you can’t compress a file on your Mac, you should first check the permissions. Right-click the file and choose Get Info. Check and ensure you have the necessary permissions under the Sharing & Permissions section.
How do you compress a video on a Mac using QuickTime?
Open the video you want to compress in QuickTime, click the top File menu, and choose the Export As option. Then, you can select a lower resolution to export it.
What does compress mean on Mac?
The compression on Mac means reducing the file size while maintaining the source data. Usually, the compressing process requires software to store the file content more effectively or remove redundancies from the file.
Conclusión
Whether you want to compress a video, photo, or document or shrink the size of other files on your Mac, you can use the related method above to make the file compression on Mac.

Video Converter Ultimate es un excelente conversor, editor y potenciador de video para convertir, mejorar y editar videos y música en 1000 formatos y más.
100% Seguro. Sin anuncios.
100% Seguro. Sin anuncios.